
views
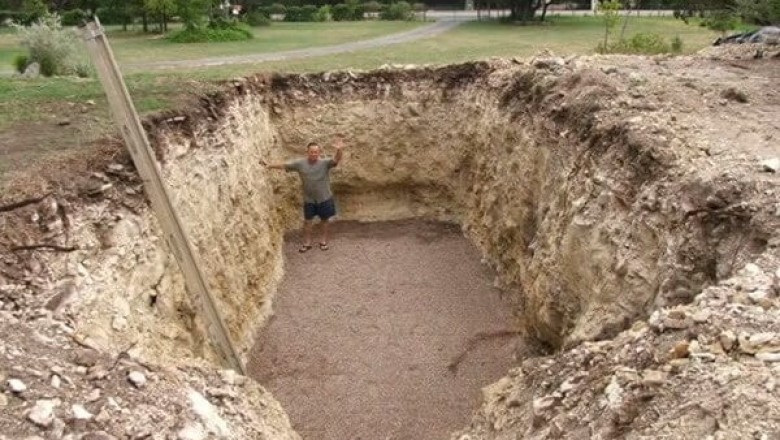
This Guy Became the Talk of the Town When He Dug a Hole in His Garden
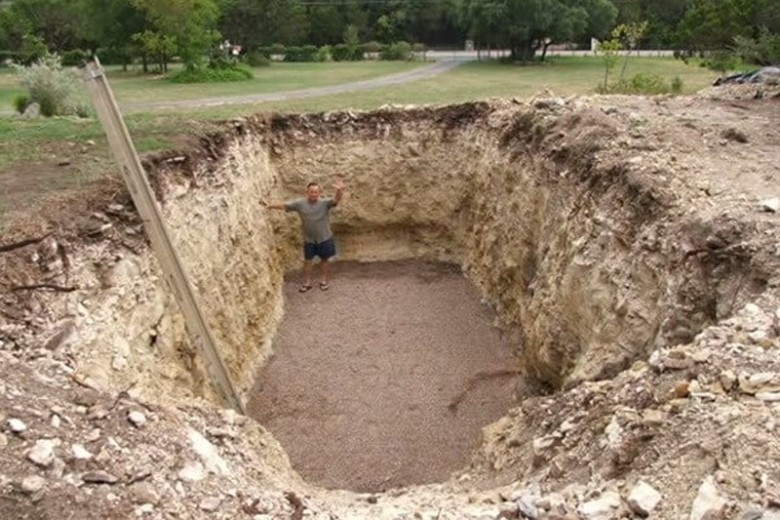
Wayne Martin had a house and a garden and decided to embark on a large-scale project to make his home something special. So, logically, he started digging a hole!

While his neighbors initially thought he was crazy, they soon realized that he had a fantastic plan for his garden. It's pretty insane what Wayne did with this giant hole, but it's definitely one of the most ambitious projects we've ever seen! Find out in the course of the story why Wayne wanted to dig this super big hole in his garden...
01. Purchasing a Six-Meter Container
Even before Wayne started digging his hole, he went out and bought a six-meter shipping container. It's pretty crazy how many of these huge containers you can find on the internet at incredibly affordable prices. As any DIY enthusiast knows, keeping costs low is one of the most important factors.
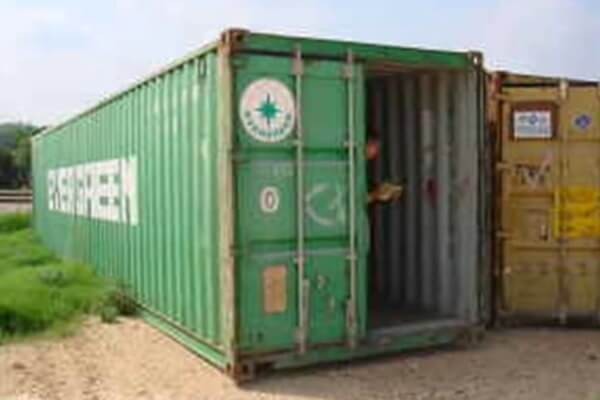
It's very easy to lose track of expenses and waste money on things you don't really need. The fact that Wayne was able to find a container of this size and still keep his budget low helped him a lot in actually realizing his project. But what exactly did he need this thing for? We'll find out soon!
02. Sealing
The first step after purchasing the container was to seal it properly. Instead of using the huge double doors, Wayne sealed them and installed a simple hinged door. But he didn't just close the doors - he made sure that absolutely nothing could enter or exit and that there were no leaks.

Another important detail was that the new door had to open inward, not outward. Now he had an entrance to his container. Don't worry - it will make much more sense once you see what comes next!
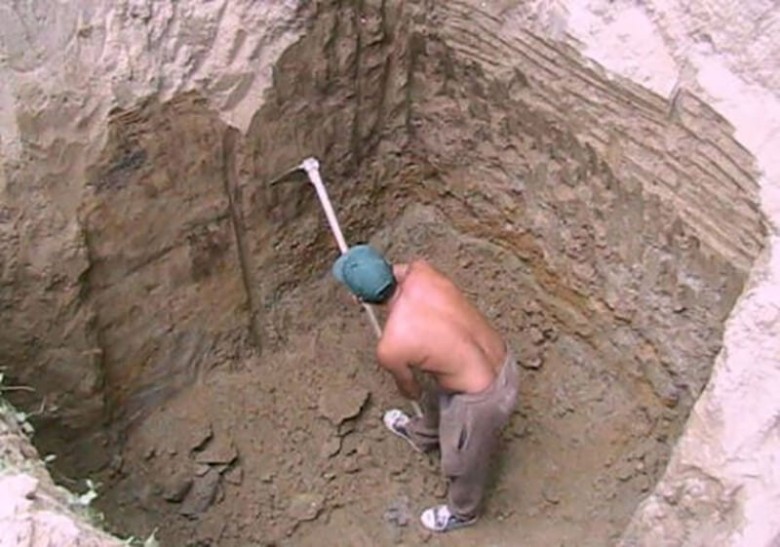
03. Measure Twice, Dig Once
The biggest mistake for Wayne would have been to dig a hole that was ultimately too small for his large container. So he tried to be clever and made sure that the excavation was at least 60 centimeters deeper than the height of the actual container. This way, he would ensure that the hole he dug was the right size.

He left the same margin on all sides. Wayne really wanted to play it safe with this project so that all his efforts wouldn't be in vain. After all, this project required a great deal of thought from all angles. Only then could he ensure its success.
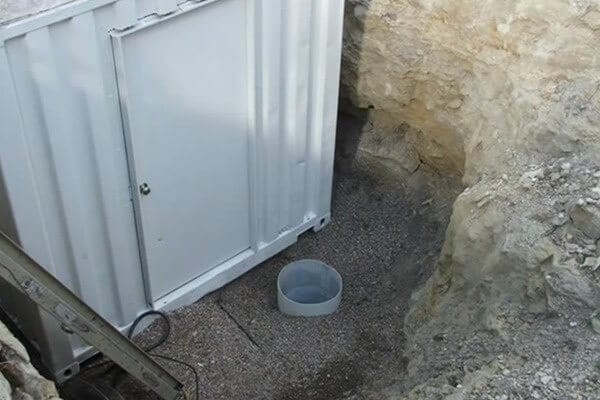
04. Covering the Ground with Gravel
Wayne then covered the ground with a layer of gravel. This was very important because the container needed to rest on something soft that could also drain water to the soil below.
By now, you've probably guessed what he was planning to do with the container and the hole, but what was the ultimate goal of his project? Well, there's a reason he wanted some extra space above the container.
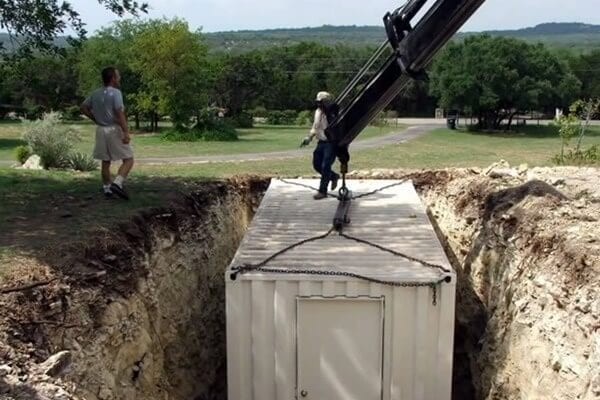
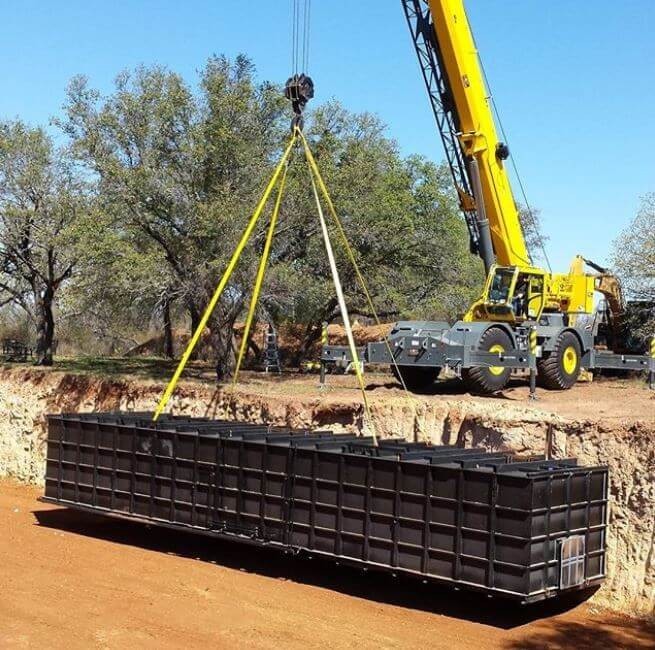
05. Sometimes, You Still Need the Help of a Professional
Even though this was intended as a DIY project, sometimes you just need a professional. Not everyone has a crane that can lift a 6-meter container and place it in a huge hole in the garden. That's why Wayne called a company specializing in septic tanks to do the dirty work for him.

Seriously, that was a much more reasonable choice than inviting a bunch of friends and trying to somehow bring the container down there. So, the container was now in the hole, but what was Wayne's plan for the next steps? It's a little more clever than you might think.
06. Fits like a glove
There are several reasons to make the hole slightly larger than the container, and that goes beyond just having some wiggle room. Wayne had left about sixty centimeters on each side, as well as some space in front of the hinged door.
Now that the container was in the hole, the project really got underway. It may seem quite obvious what Wayne might have had in mind, but the finished project will definitely inspire you to raise your DIY ambitions.
07. Every bunker needs a sump pump
A sump pump is a device that plumbers install when water needs to be pumped out of enclosed spaces. It is a crucial component when building anything underground. It helps keep the water level below the bunker, which is why these devices are often found in basements.
After all, you want to prevent any incoming water from ruining everything you have built in the underground bunker. But what exactly did Wayne plan to do in his bunker? The answer to this question is coming up.
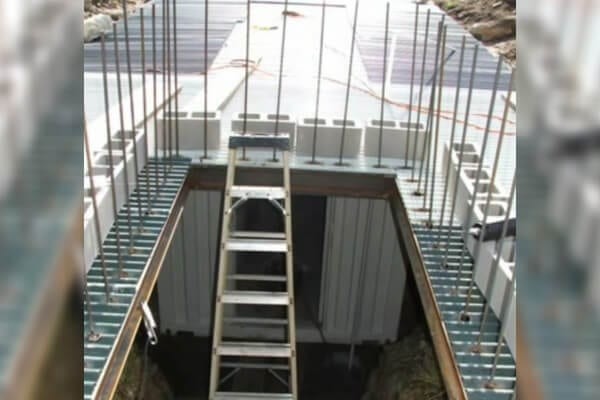
08. A royal entrance
When building an underground bunker, you naturally need a way to get in. Wayne did the logical thing and installed a concrete staircase that was at the same level as the ceiling of his bunker.
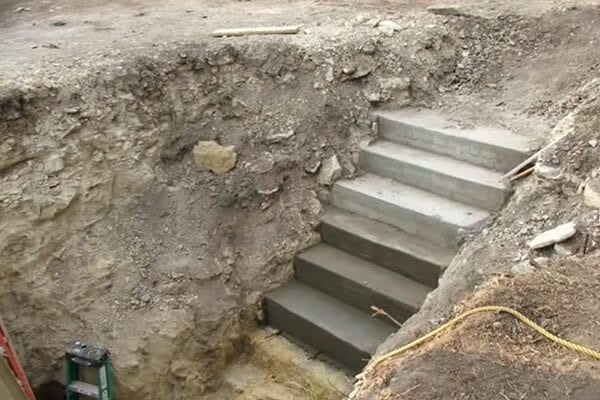
Most people would probably prefer a simple staircase rather than a ladder or a fireman's pole to slide down. Now that his bunker was in the ground and the staircase was completed, Wayne could move on to finishing the exterior and then working on the interior.
09. Everyone needs support beams
Wayne was smart enough to install these two I-beams to ensure that his bunker was as stable as possible. While it may be hard to imagine a huge steel container easily shifting, the ground underneath could easily settle and throw the bunker out of alignment.

But the two beams served another purpose as well. They not only supported the bunker but also served as a framework for Wayne's further plans for the exterior of the underground bunker. And what else does Wayne have in store? You will find out soon.
10. Is he making a roof?
So far, we haven't considered that when building an underground bunker, it is also important to ensure that the roof remains stable. Wayne installed a lot of frame elements for this purpose, which now makes sense why he mounted the I-beams first.
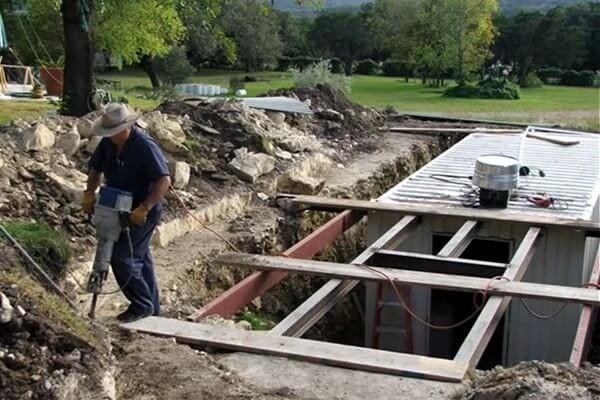
This also indicates what he might have planned for the rest of the bunker. Fortunately, he had thought of digging the hole a little deeper because now it looks like everything will perfectly blend with his garden in the end.
11. A hidden roof
An underground roof is somewhat hard to imagine. But that was exactly the plan here. Wayne placed heavy metal sheets over his framework so that they could eventually bear the weight of a person... and even a dog!
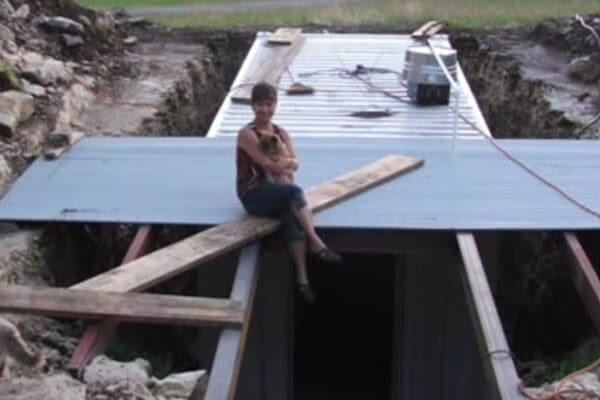
Of course, this was only the first step in laying the roof, but it gives you a good idea of what they had in mind.
Now that the exterior is finally taking shape, we are still curious about what's happening inside the bunker. What does he actually plan to do with it?
Find out what the goal of this project was. Did Wayne really think of everything, and will the project turn out as planned?
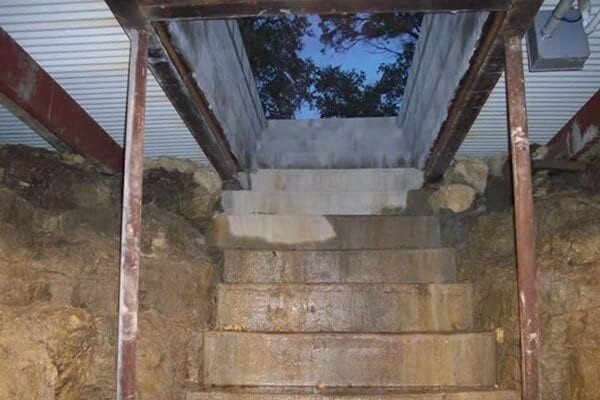
12. More than just a staircase
We briefly mentioned before that the staircase would be the only way in or out, but Wayne wasn't satisfied with just a regular entrance. Once he had finished laying and securing the roof, he started working on the access to his bunker.
He left an opening in the roof and installed some reinforced concrete to support everything. This is one of the underrated aspects of his project. Why go through all the trouble and then build a plain entrance? Go big or go home.
13. Stacking the brick blocks
Wayne clearly paid close attention to safety during the construction of his bunker. Not only did he ensure that it was firmly and securely buried in the ground, but he also strictly adhered to regulations.
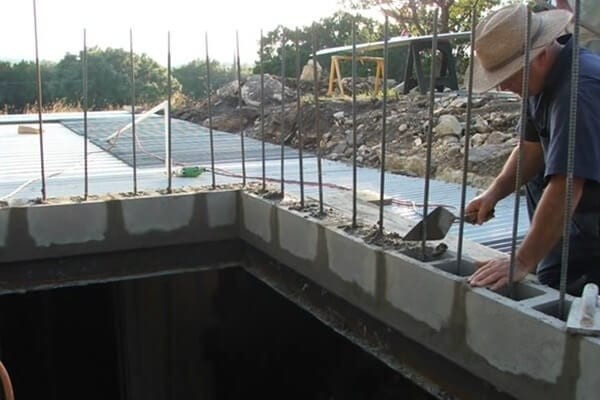
This was clearly designed to withstand a lot, and it almost looked like it could serve as an improvised bomb shelter if necessary. Was that what Wayne was working on, or did he have a different plan for his underground bunker?
14. Pumping in the air
More important than the installation of the sump pump for drainage was the installation of ventilation. Without access to fresh air underground, it's hard to survive, so Wayne installed two 30-centimeter fans at both ends of the bunker.

This indicates that he probably intended to spend a lot of time in his bunker, but for what reason? It's actually much more practical than you might think.
15. Time to pour the concrete
You might have thought that everything should already be in place, but Wayne left nothing to chance. The ground can settle and shift, especially when it freezes in winter, so Wayne wanted to encase his bunker in concrete both on the sides and from above.
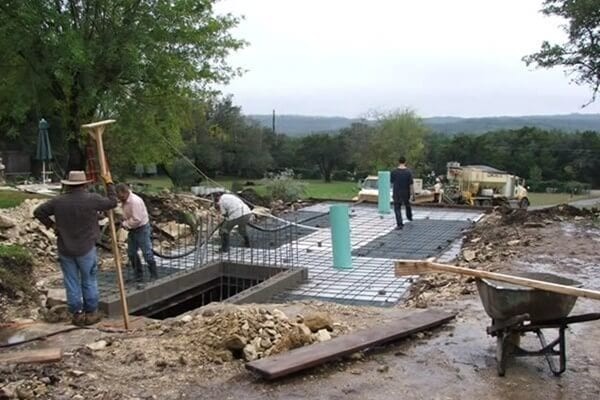
As you can see, the pour is perfect. Everything looks smooth, and it should blend in perfectly with the rest of his garden. You can also see how much space the project has taken up in his garden, but it's progressing well, and all the effort will be worth it in the end.
16. 15 centimeters of separation
If you thought Wayne just laid a thin layer of concrete over his bunker, you are mistaken. He made sure to pour 15 centimeters on top, which is quite impressive.

It seems like he wants to make his bunker completely secure, whether it's from rain, hail, or snow. Now that the bunker is ready for anything nature could throw at it, work can begin on the interior.
17. More bricks
Once all the concrete had cured, Wayne went back to the basics and added a few more bricks to the entrance enclosure. He clearly wanted the entrance to stand out and be well protected. For the only part of the bunker that would be exposed to the elements, a little extra protection couldn't hurt.

The door would surely take a beating over the years, so it was definitely worth keeping bad weather or animals out as much as possible. Now that he was finally done with the exterior, let's go down the stairs and see what it looks like inside!
18. Removing the temporary support braces
As we have mentioned multiple times before, safety is a top priority in a project like this. There is absolutely no justification for shortcuts or neglecting any safety measures to make such a bunker absolutely secure. And when you invest so much time and money, cutting corners doesn't pay off.
So, when the concrete was dry and stable, Wayne could finally remove the braces that had been securing the roof until then. All those bricks may have looked decorative, but they also helped provide the foundation for a perfect bunker.
19. Earth is being refilled around the bunker
The bunker should not be standing in a dirty hole in the middle of the garden, so Wayne gathered the best soil and filled the space around the entrance with it. In the end, he was able to sow plants and let everything blend back into the rest of his garden.
It is already clear that the end result will not reveal that there was once a huge hole in the garden. And it is unlikely that anyone will suspect that there is an underground bunker here.
20. Wait, is it all wine?
No idea what you were expecting, but the fact that this cellar is filled with wine is quite a surprise. However, it does make sense. Wine is best stored underground, and with the cool climate, it should last for decades.
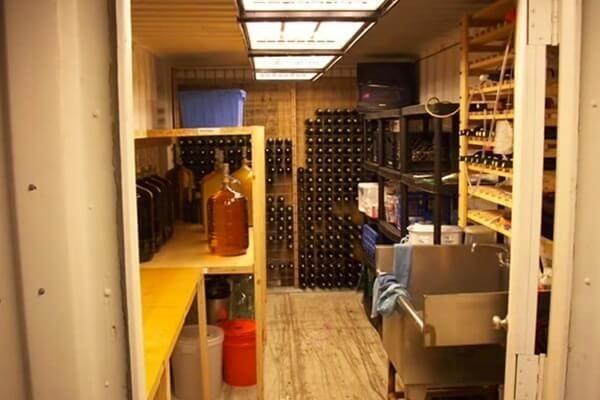
But is that the sole reason for building this bunker, or are there even bigger plans? Let's see what else could be possible.
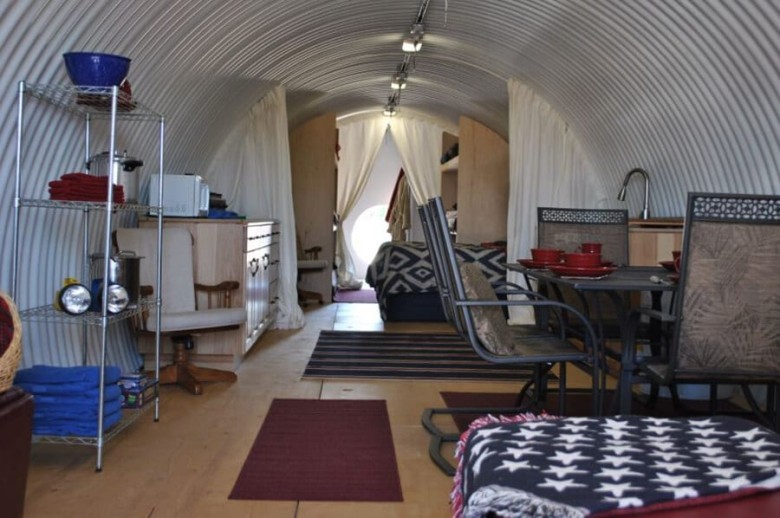
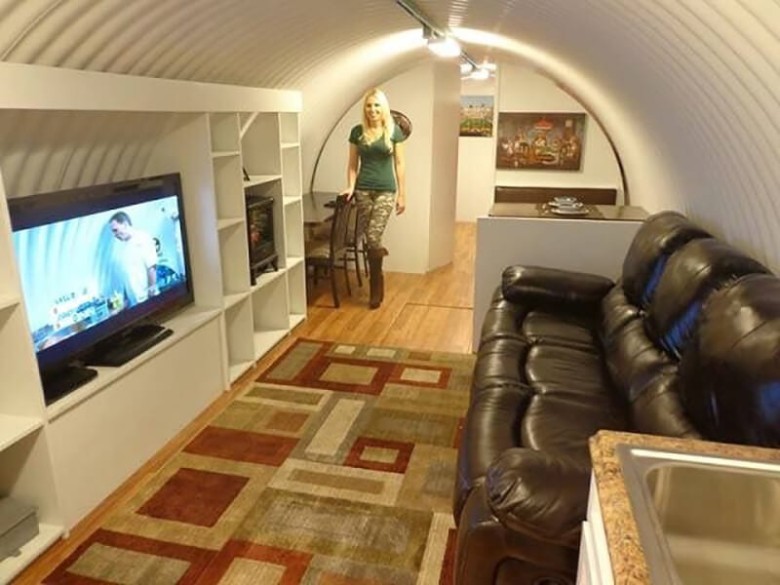
21. More than meets the eye
The great thing about a container like this is that it can meet so many different needs. As you can see, there is plenty of storage space, and now that it's filled with wine, it could also serve as storage for Christmas decorations or non-perishable food for emergencies.

Just imagine if something terrible happens, like a natural disaster. Wayne now has a shelter for his needs, where he can stay for a few hours or even a few days. And the best part is that it doesn't take up any space in his garden because everything is built underground!
22. The plans are accessible to everyone
One of the most interesting aspects of Wayne's project is the fact that with a little money and resources, anyone can do the same. Instead of keeping his bunker a secret, Wayne decided to share his masterpiece with the world, even down to the details of how he built it.

He even provided the exact dimensions of his container project and made notes on what aspiring builders should pay attention to when undertaking a similar endeavor. He also shared some tips he learned during his work.
23. A few tips
Now that Wayne has completed his bunker, he shared some tips and recommendations for those who may be considering building such a bunker themselves. One of his suggestions is to add a railing to the stairs leading to the entrance. This is definitely a good idea, especially if you live in a cold place where the stairs could freeze and become slippery.

He also mentioned that a small canopy above the entrance could be useful. This makes sense, especially if you live in a place with unpredictable weather where the stairs could ice over or the entrance could fill with rainwater. It may also help keep crawling creatures and rodents away from the entrance.
24. He is not the only one with this idea
It is recommended to use as much concrete as possible and build a strong roof. In the 1960s, these bunkers were not well thought out, but now people have better access to information and resources.

So how many Americans have a bunker nowadays? In the past, bunkers served as protection. Today, a bunker provides so much more space and storage for things that don't fit in the house. However, there are still many who want a shelter for themselves and their families.
25. The Bunker Business Is Booming
In 2017, bunker construction companies experienced a significant increase in their business numbers. Americans wanted to be prepared for times of war as international relations became increasingly tense and uncertainty about the future grew.
Clyde Scott, owner of Rising Bunkers, a bunker construction company from Texas, says that his business reached a record high in 2016/17. His sales increased by an incredible 400 percent, generating an annual revenue of around nine million euros.
26. What Did It Cost?
In addition to all the work, Wayne's project naturally had a cost, but it is still within a reasonable range. All in all, Wayne spent the equivalent of 11,000 euros on his DIY bunker, which is really affordable. He did most of the work himself and already owned his own tractor, which likely helped with tasks such as filling the earth and digging the original hole.

Nevertheless, he found an extremely cost-effective way to create his own bunker. Most others would have turned to the growing industry of professional bunker builders.
27. The Upper Middle Class Prepares
Paul Seyfried is the owner and CEO of Utah Shelter Systems, and he says that his company has been very busy in recent years. While his customers come from all over the country, Seyfried states that most orders come from New York, California, and Texas.
Seyfried told Fox13, "The smallest shelters start at about $50,000. The largest ones, which are about 3.5 times 15 meters, come to about $100,000." Most customers have the shelters built for their families, and they also withstand electromagnetic pulses and radiation.
28. Bunkers for Sale in South Dakota
Vivos xPoint is a decommissioned military base in South Dakota. It has not been used since 1967, but now there are plans to reactivate the World War II-era bunkers, this time for civilian use.

There are already an incredible 575 concrete bunkers in the grasslands bordering Wyoming, and more are expected to be added. The bunkers here are available for a lease of around 23,000 euros for 99 years, plus an annual fee of approximately 900-1,000 euros. With 480 and 650 square meters, they are very spacious. However, they lack running water, electricity, and air filtration, so there is still much work to be done.
29. Multiple Options to Choose From
Atlas Survival Shelters from California claims to have sold 30 shelters in just three days after Donald Trump took office. When compared to the ten they sold throughout the entire year of 2011, it is clear how much interest has increased.
The shelters offered are designed to provide all the comforts of a home. So, if one is looking for protection without feeling like they are crouching in an unfinished basement, this is a good choice. Many of the customers are baby boomers who still remember the threats of a nuclear strike or missile attack from their youth and want to be prepared.


Comments
0 comment